A Self hosted CRM platform like Krayin helps manage customer interactions throughout the lifecycle across channels. Here, we’ll guide you on creating a custom package in Krayin.
Below are the steps on how to create the custom package in Krayin.
Building a Package in Krayin Step-by-Step Tutorial
In this Krayin package, we have a scenario in which whenever the Admin Lead follow-up pipeline gets updated automatically an email goes to the Admin.
1) Module Setup
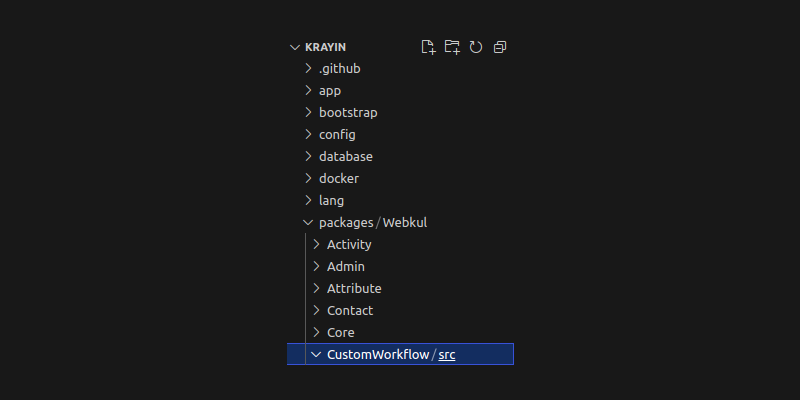
So in installing Krayin, you will get the directory name Webkul which contains the packages for Krayin.
Create a directory named CustomWorkflow & src inside the Webkul folder at the root of the Krayin installation.
Packages directory is the container of all namespaces of packages.
A namespace or vendor name is a group of entities or classes separated from other namespaces with the same name so they don’t conflict.
Every extension or package that we will develop should be kept in the same namespace to avoid conflict between classes with the same name.
Now add the below code inside the “autoload psr-4” in the composer.json file as shown below.
"Webkul\\CustomWorkflow\\": "packages/Webkul/CustomWorkflow/src"
Now register in the provider array with the array merge function in the config/app.php file which is presented in the root directory of Bagisto.
Webkul\CustomWorkflow\Providers\CustomWorkflowServiceProvider::class
2) Providers
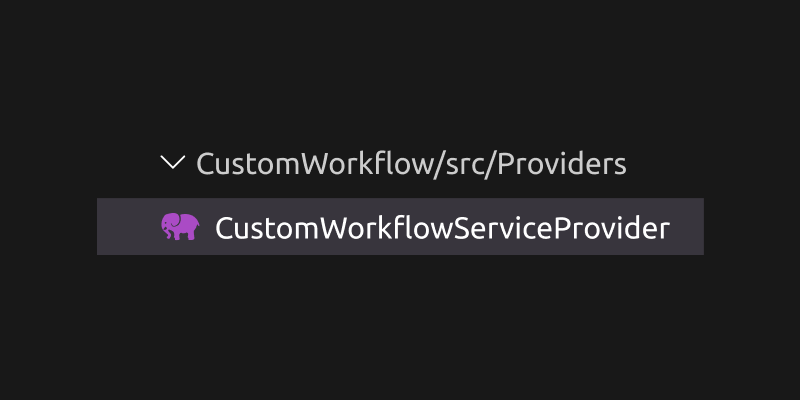
In the src folder, create a folder named Providers. Inside that folder, create a file named CustomWorkflowServiceProvider.php.
Make sure to create the file name according to your module name. Now the structure will look like this.
CustomWorkflowServiceProvider.php
<?php

namespace Webkul\CustomWorkflow\Providers;

use Illuminate\Support\ServiceProvider;

class CustomWorkflowServiceProvider extends ServiceProvider
{
    /**
     * Bootstrap services.
     *
     * @return void
     */
    public function boot()
    {

    }

    /**
     * Register services.
     *
     * @return void
     */
    public function register()
    {

    }
}
composer dump-autoload
EventServiceProvider.php
<?php

namespace Webkul\CustomWorkflow\Providers;

use Illuminate\Support\Facades\Event;
use Illuminate\Support\ServiceProvider;

class EventServiceProvider extends ServiceProvider
{
    /**
     * Bootstrap services.
     *
     * @return void
     */
    public function boot()
    {
        Event::listen('lead.update.after', 'Webkul\CustomWorkflow\Listeners\Lead@update');
    }
}
Load Events from boot() method.
Add the below line inside your service provider inside the boot() method.
$this->app->register(EventServiceProvider::class);
3) Listeners
Listeners in Krayin are a way to implement the observer pattern, where listeners respond to events that occur in the application.
Now create a Listeners folder and a file as mentioned below.
Lead.php
<?php

namespace Webkul\CustomWorkflow\Listeners;

use Illuminate\Support\Facades\Mail;
use Webkul\CustomWorkflow\Mail\CustomWorkflow;

class Lead
{
    public function update($lead)
    {
        Mail::queue(new CustomWorkflow($lead->user));
    }
}
4) Mail
In this section, we will explain how to customize email templates in Krayin.
Customizing email templates allows you to personalize the appearance of your emails according to your preferences.
Now create a Mail folder and a file as mentioned below.
CustomWorkflow.php
<?php

namespace Webkul\CustomWorkflow\Mail;

use Illuminate\Bus\Queueable;
use Illuminate\Contracts\Queue\ShouldQueue;
use Illuminate\Mail\Mailable;
use Illuminate\Mail\Mailables\Content;
use Illuminate\Mail\Mailables\Envelope;
use Illuminate\Queue\SerializesModels;

class CustomWorkflow extends Mailable implements ShouldQueue
{
    use Queueable, SerializesModels;

    /**
     * Create a new message instance.
     * @param object $user
     * @return void
     */
    public function __construct(private $user)
    {
    }

    /**
     * Get the message envelope.
     */
    public function envelope(): Envelope
    {
        return new Envelope(
            to: $this->user->email,
            subject: "Lead Status",
        );
    }

    /**
     * Get the message content definition.
     */
    public function content(): Content
    {
        return new Content(
            view: 'customworkflow::mail.customer',
            with: ['fullName' => $this->user->name],
        );
    }
}
5) Resources
Create a Resources folder in the packages/Webkul/CustomWorkflow/src path. Inside the Resources folder, create another folder named views.
Now inside the views folder, we need to create one more folder ie mail.
Now create a file by the name of customer.blade.php
customer.blade.php
<!DOCTYPE html>
<html lang="en">
<head>
    <meta charset="UTF-8">
    <meta name="viewport" content="width=device-width, initial-scale=1.0">
    <title>Document</title>
</head>
<body>
    Hello {{$fullName}}<br><br>

    Your Follow-Up Pipeline Is Updated.<br><br>

    Thanks & Regards..!!
</body>
</html>
Load View from boot() Method
Now load views from the service provider inside the boot() method.
$this->loadViewsFrom(__DIR__ . '/../Resources/views', 'customworkflow');
Thanks for reading this blog. I hope you’ll get an idea of how to create a custom package.
Please share your reviews on this, which will support me to write more.
You can directly get the code from the GitHub Custom Workflow repository
Additionally, you can also Hire Laravel Developers to help you with your project requirements and ensure the successful implementation of your ideas.


1 comments